
The Art of Backgrounds: How to Make Your Subject Shine
Picture by: Phillip Haumesser
Photography is all about focus—not just the literal focus of your lens, but the way you direct your viewer’s attention to what matters most in your frame. Your subject is the star of the show, but a poorly chosen background can steal the spotlight or, worse, turn your masterpiece into a mess. Today, we’re diving into the art of mastering backgrounds in photography—why they’re critical, common mistakes to avoid, and practical tips to make your subjects pop every time.
Why Backgrounds Matter
Think of your photo as a stage. Your subject is the lead actor, delivering the performance of a lifetime. The background? It’s the set design. A good set enhances the story, while a bad one distracts the audience. A cluttered or overly bright background can pull attention away from your subject, while a well-chosen one complements them, adding depth, context, and emotion.
I’ve seen it time and again in my own work: a family portrait with a perfect pose and lighting, ruined by a bright red car in the background that screams, “Look at me!” Or a landscape where a random power line cuts through the serene beauty of a sunset. Mastering backgrounds is about controlling the narrative of your image.
Common Background Mistakes (And How to Avoid Them)
Let’s start with the pitfalls. Even pros make these mistakes, so don’t feel bad if you’ve been guilty of them too. The key is learning to spot and fix them.
Cluttered Backgrounds
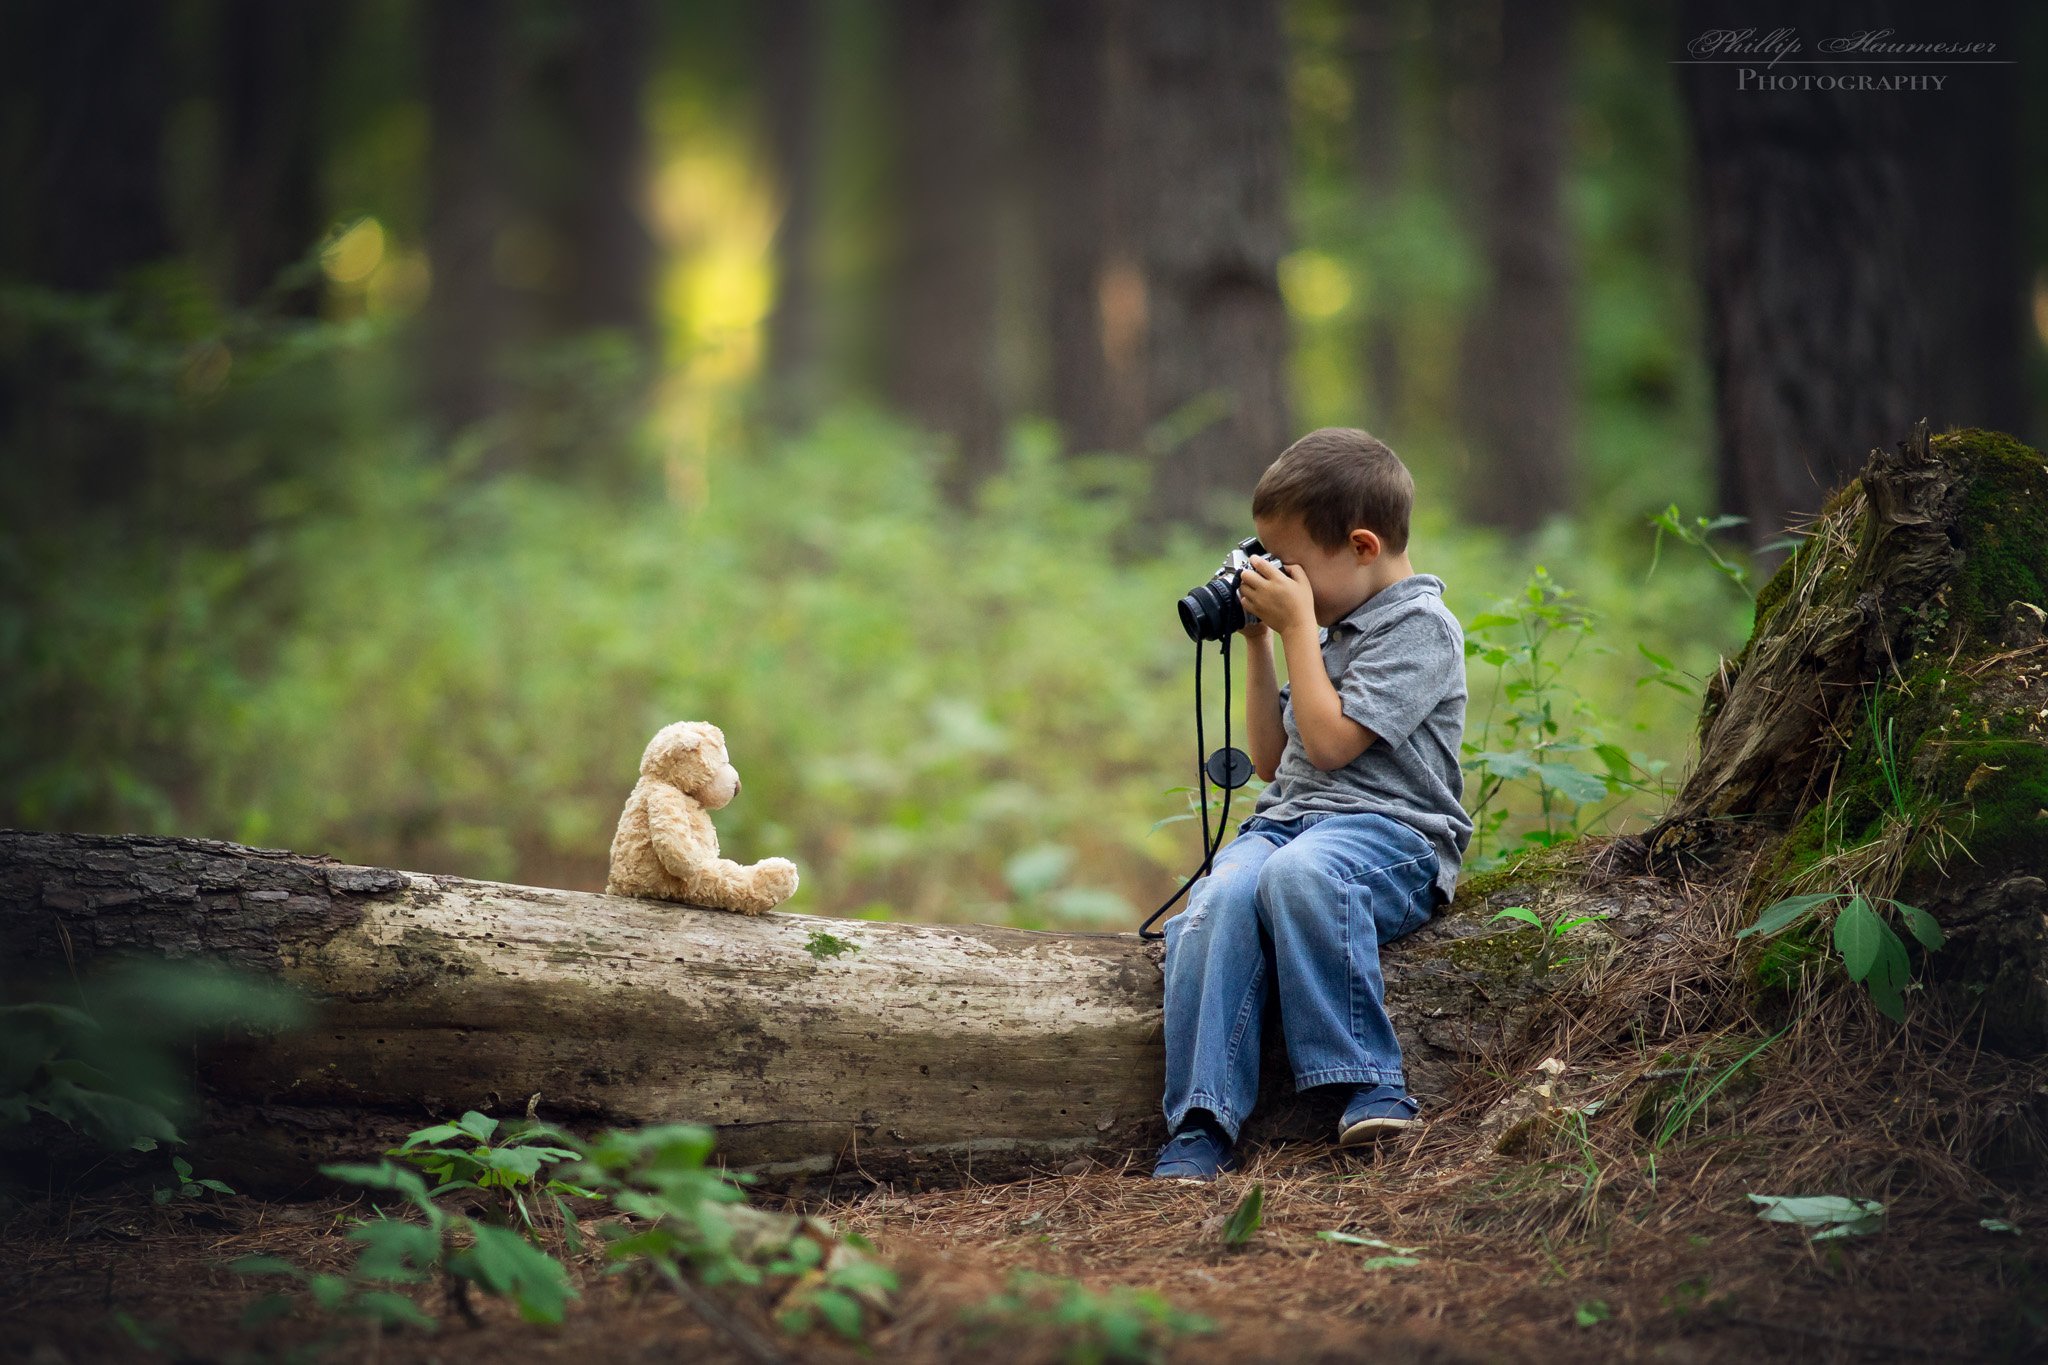
A busy background—think crowded streets, messy rooms, or a forest with too many branches—can overwhelm your subject. To fix this, simplify. Move your subject to a cleaner location, change your angle to exclude distractions, or use a wide aperture (like f/1.8 or f/2.8) to blur the background with bokeh. That creamy blur makes your subject stand out like a star.Bright or Contrasting Elements
Bright colors or high-contrast objects (like a white sign or neon lights) draw the eye away from your subject. Before shooting, scan for anything that’s brighter or bolder than your subject. If you can’t avoid it, try repositioning or using post-processing to tone it down.Lines That Cut Through
Lines like fences, poles, or horizons can be great for composition, but if they intersect your subject awkwardly (like a pole “growing” out of someone’s head), they ruin the shot. Adjust your position to ensure lines lead to your subject, not through them.Lack of Context
Sometimes, a background is too plain, making the image feel flat or disconnected. A portrait against a blank wall might be clean, but it can lack personality. Look for backgrounds that add context—like a rustic barn for a country vibe or a cityscape for an urban feel.
Practical Tips for Perfect Backgrounds
Ready to take control of your backgrounds? Here are actionable strategies to make your subjects shine:
Scout Before You Shoot
Before you even lift your camera, take a moment to walk around and study the scene. Look for clean, uncluttered areas or elements that complement your subject. For example, if you’re shooting a child’s portrait, a grassy field or a wooden fence might add warmth and context without stealing focus.Use Depth of Field Like a Pro
A shallow depth of field (low f-stop number) is your best friend for blurring distracting backgrounds. For portraits, try f/1.4 to f/2.8 to create that dreamy bokeh effect. For landscapes, you might want a deeper depth of field (f/8 or higher) to keep the background in focus if it adds to the story.Change Your Perspective
Sometimes, a small shift in your position can make a huge difference. Move left, right, up, or down to exclude distractions or include elements that enhance the scene. Shooting from a low angle can eliminate a busy horizon, while a high angle might reveal a cleaner background.Incorporate Natural Frames
Use elements like doorways, windows, or tree branches to frame your subject and draw attention away from a busy background. This not only focuses the viewer’s eye but also adds depth and context.Leverage Light and Color
Light can be a background’s best friend or worst enemy. Soft, diffused light (like during golden hour) creates gentle, flattering backgrounds, while harsh light can create distracting shadows. Similarly, choose backgrounds with colors that complement your subject—earthy tones for a natural feel, or bold colors for a dramatic pop.Post-Processing to the Rescue
Sometimes, you can’t control the background in the moment. That’s where editing comes in. Use tools like Lightroom or Photoshop to blur, darken, or desaturate distracting elements. You can also crop to recompose the shot or remove unwanted objects entirely.
Real-World Examples
Let’s break this down with a couple of scenarios I’ve encountered in my own work:
The Family Portrait Fiasco: I was shooting a family in a park, and the lighting was perfect—golden hour, soft and warm. But behind them was a playground with bright red slides and a group of kids running around. The solution? I moved the family 10 feet to the left, where a row of trees created a natural frame and a blurred green background. The result was a cozy, intimate portrait that felt timeless.
The Urban Engagement Shoot: For an engagement session in a city, the couple wanted a gritty, urban vibe. But the busy street behind them had too many signs and cars. By shooting from a low angle and using a 50mm lens at f/1.8, I blurred the background into a colorful bokeh, keeping the focus on the couple while still hinting at the city atmosphere.
Practice Makes Perfect
Mastering backgrounds takes practice, but it’s one of the fastest ways to elevate your photography. Here’s a challenge: Go out this week and shoot 10 photos, focusing solely on the background. For each shot, ask yourself:
Does the background enhance or distract from my subject?
Can I simplify it by moving, changing my angle, or adjusting my aperture?
Does the background add context or tell a story?
Review your shots and note what worked and what didn’t. Over time, you’ll develop an instinct for spotting great backgrounds and avoiding problematic ones.
The Emotional Power of Backgrounds
A great background doesn’t just look good—it feels good. A soft, blurred field behind a family can evoke warmth and togetherness. A stark, urban wall behind a model can convey strength and edge. Every background choice you make shapes the emotional impact of your image.
In my work, I love using backgrounds to tell a story. A weathered barn behind a couple might hint at their rural roots, while a misty forest can add mystery to a portrait. Think about the story you want to tell, and let your background help you tell it.
Wrapping It Up
Backgrounds are the unsung heroes of photography. They can make or break your image, but with a little attention and practice, you can turn them into powerful tools that elevate your work. Start by scanning your scene, experimenting with depth of field, and thinking about the story you want to tell. Before you know it, you’ll be creating images that not only look stunning but also feel unforgettable.
So, grab your camera, find a subject, and start playing with backgrounds. Your next great shot is waiting!
~Phillip
Want to Nail Every Shot?
Backgrounds can make or break your photos, but they’re just one piece of the puzzle. In my Online Photography Academy, you’ll learn how to master backgrounds, lighting, composition, and more with over 100 video tutorials. Plus, you can ask me your questions directly, and I’ll even create new videos to answer them. Ready to create images that stop people in their tracks? Join the Academy today, and let’s make your photography shine!